Added in 24.06.
Learn about how to create a React component using Commands for your Aurora Community.
React components are created by adding code to your community’s Git repository and displayed in your community by adding them to a page quilt. We will make a Cat Fact React component and display it as a button in the UI.
Requirements
To create a React component, you must meet the following requirements:
- Access to your community’s Git repository
- Admin role to add the React component to a page in your community.
Contents of a React Component
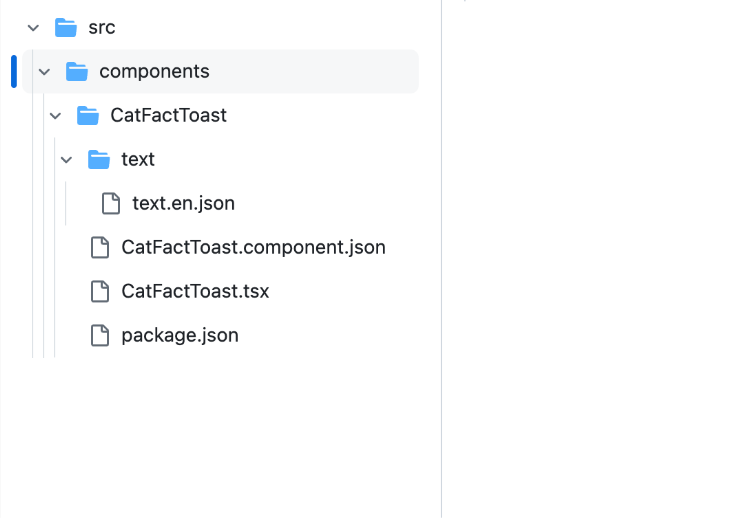
The React component folder in the Git repository must have these mandatory files:
- A text file (
text.en.json) to provide translated text to the custom component .component.json- A component descriptor file.tsx- The Typescript React componentpackage.json- Specifies any additional NPM libraries your component might need
Command Actions
- Sign in to your community’s git repository.
- Ensure your community’s Git repository has a
/srcfolder. If there is no src folder, create one using:mkdir src - Create a components folder under the src folder:
mkdir components - Create a CatFactToast folder under your components folder.
- Create a text folder under the CatFactToast folder.
Add a filetext.en.jsonwith the following content:{ "button.title": "Cat fact!" } - Inside the CatFactToast folder, create a
CatFactToast.component.jsonfile with the following code:{ "id": "CatFactToast", "markupLanguage": "REACT", "defaults": { "config": { "applicablePages": [], "description": "This example component calls the custom CatFact endpoint and displays a toast with the result." }, "props": [] }, "components": [ { "id": "custom.widget.CatFactToast" } ], "grouping": "CUSTOM" } - Create a
CatFactToast.tsxfile with the following code inside the CatFactToast folder:import type { CustomComponentProps } from 'aurora/externalContext'; import React from 'react'; /** * This example component calls the custom CatFact endpoint and displays a toast with the result. */ const CatFactToast: React.FC<CustomComponentProps> = ({ auroraContext }) => { const { components, utils } = auroraContext; const { log, i18n, addToast, postToInternalApi } = utils; const { Button, Panel, PanelBody, enums } = components; const { ToastVariant, ToastAlertVariant } = enums; function showToast( toastTitle: string, toastMessage: string, toastVariant = ToastVariant.FLYOUT, toastAlertVariant = ToastAlertVariant.SUCCESS ) { addToast({ id: 'catfact-toast', title: toastTitle, message: toastMessage, toastVariant, alertVariant: toastAlertVariant }); } async function fetchCatFact() { try { const endpoint = '/endpoints/catfact'; const factResponse = await postToInternalApi(endpoint); if (factResponse.ok) { const json = await factResponse.json(); const [toastTitle, toastMessage] = json.message.split(':'); showToast(toastTitle, toastMessage, ToastVariant.BANNER, ToastAlertVariant.INFO); } else { log.warn('Unable to call endpoint at %s: %s', endpoint, factResponse.statusText); } } catch (error) { log.error(error, 'Error fetching cat fact'); } } return ( <div> <Panel> <PanelBody> <p> <Button onClick={() => fetchCatFact()}>{i18n.formatMessage('button.title')}</Button> </p> </PanelBody> </Panel> </div> ); }; export default CatFactToast; - Create a
package.jsonfile with the following content:{ "name": "@customer/catfact-toast-component", "version": "0.0.1", "private": true, "devDependencies": { "@types/react": "^18.2.22" }, "dependencies": { "react": "^18.2.0" } } - Commit and push these changes to a branch of your plugin in your community.
- Create a pull request to merge these changes into the main branch of your plugin (
<phase>-main, notmain). The pull request must be merged.
Add a React Component to a Page
- Sign in to your community.
- Open the Account menu and select Designer.
- Go to Page Templates and select the page where you want to add the custom component.
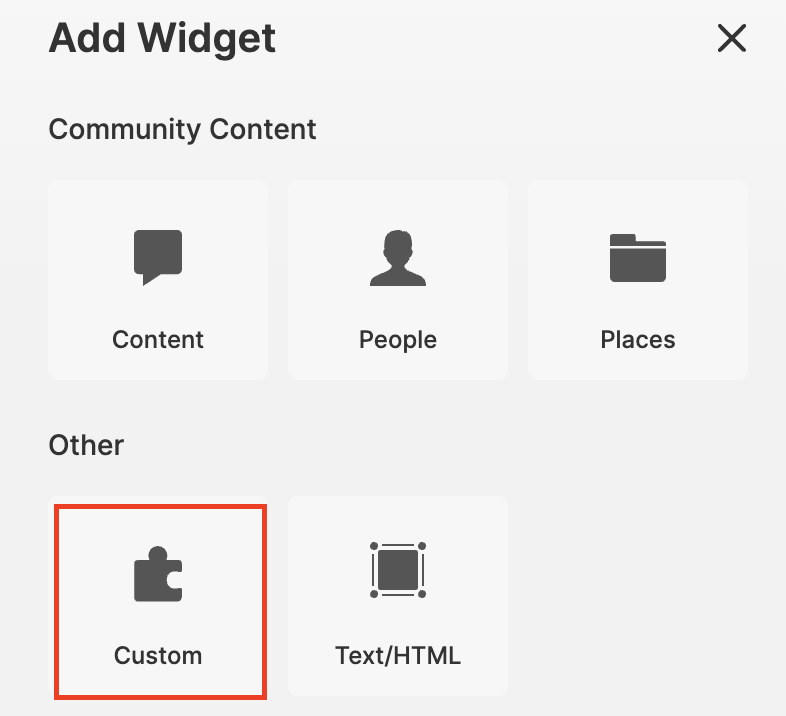
- Select the "+" symbol to add the component.
- Select Custom under Other.
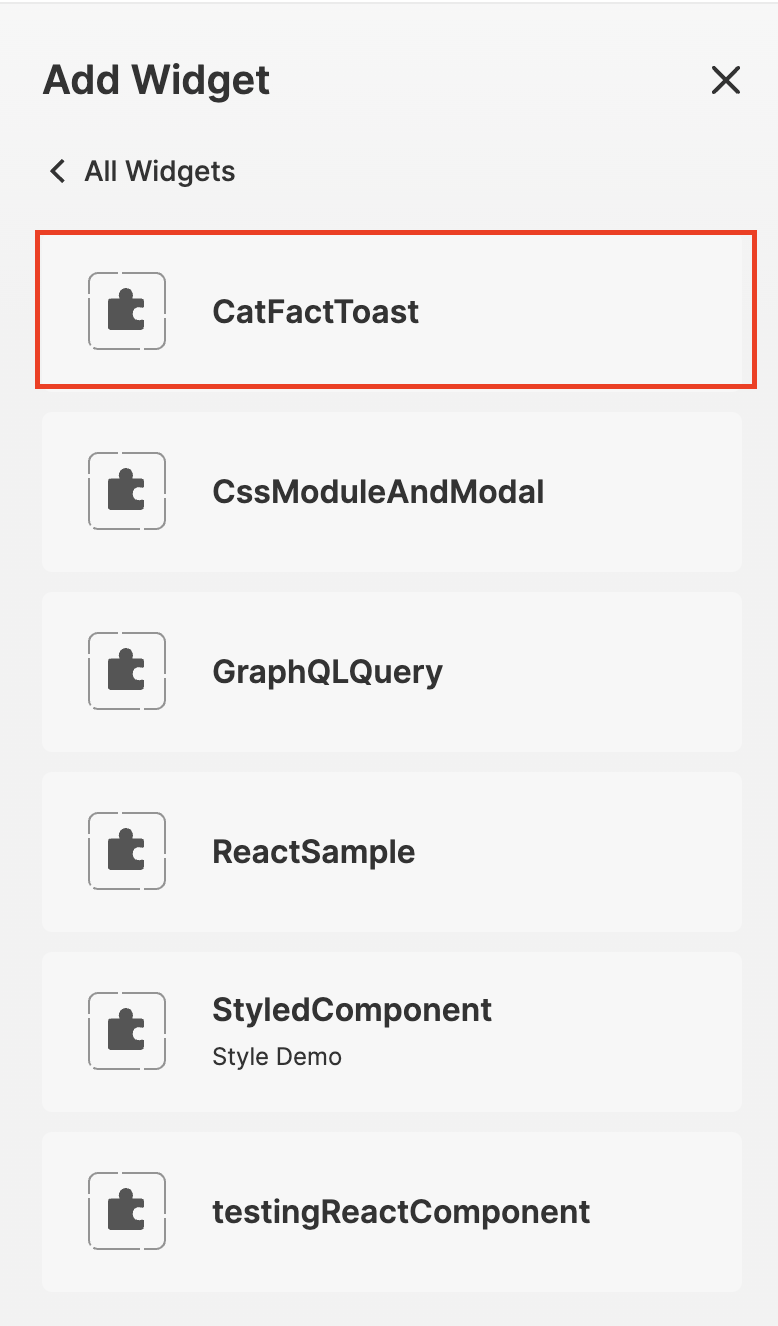
- Select the CatFactToast component.
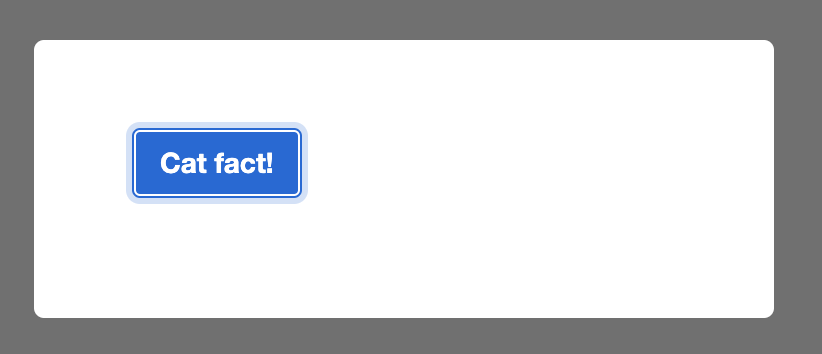
This will add your React component to your page quilt. - Select Save and Publish.
The component is displayed on the page. - In your browser, navigate to the page where the component was published.
- In a new terminal shell, run:
This will start the dev server process. The process can be stopped using Ctrl+C.npm run dev - In your browser, reload the page with the component.
The sample React component will now load from your local dev server (http://localhost:3002). - Edit the src/components/ReactComponent/Component.tsx file.
- In your browser, reload the page with the component.
Your changes will be reflected on the component.
After the dev process stops, all changes are cleared. Note that the temporary changes are only visible while logged in. - To continue development on a separate branch, create a new branch of your plugin from
qa-main. - After this is complete, you can safely remove the custom component from the page where it was added from the Designer. It will still appear on the page as long as you specify your branch as the Active Branch in Dev Tools (
/admin/devin your community).
ATLAS
Comments