An overview of the branch changing features in Aurora.
Using the Change Active Branch tool, you can change the active branch so the current member can preview changes before merging them to the staging branch.
The branch-switching tool currently has five branches available at a time. This is to simplify the Git branch process and keep the Change Active Branch tool's drop-down menu manageable.
Make branches available for switching
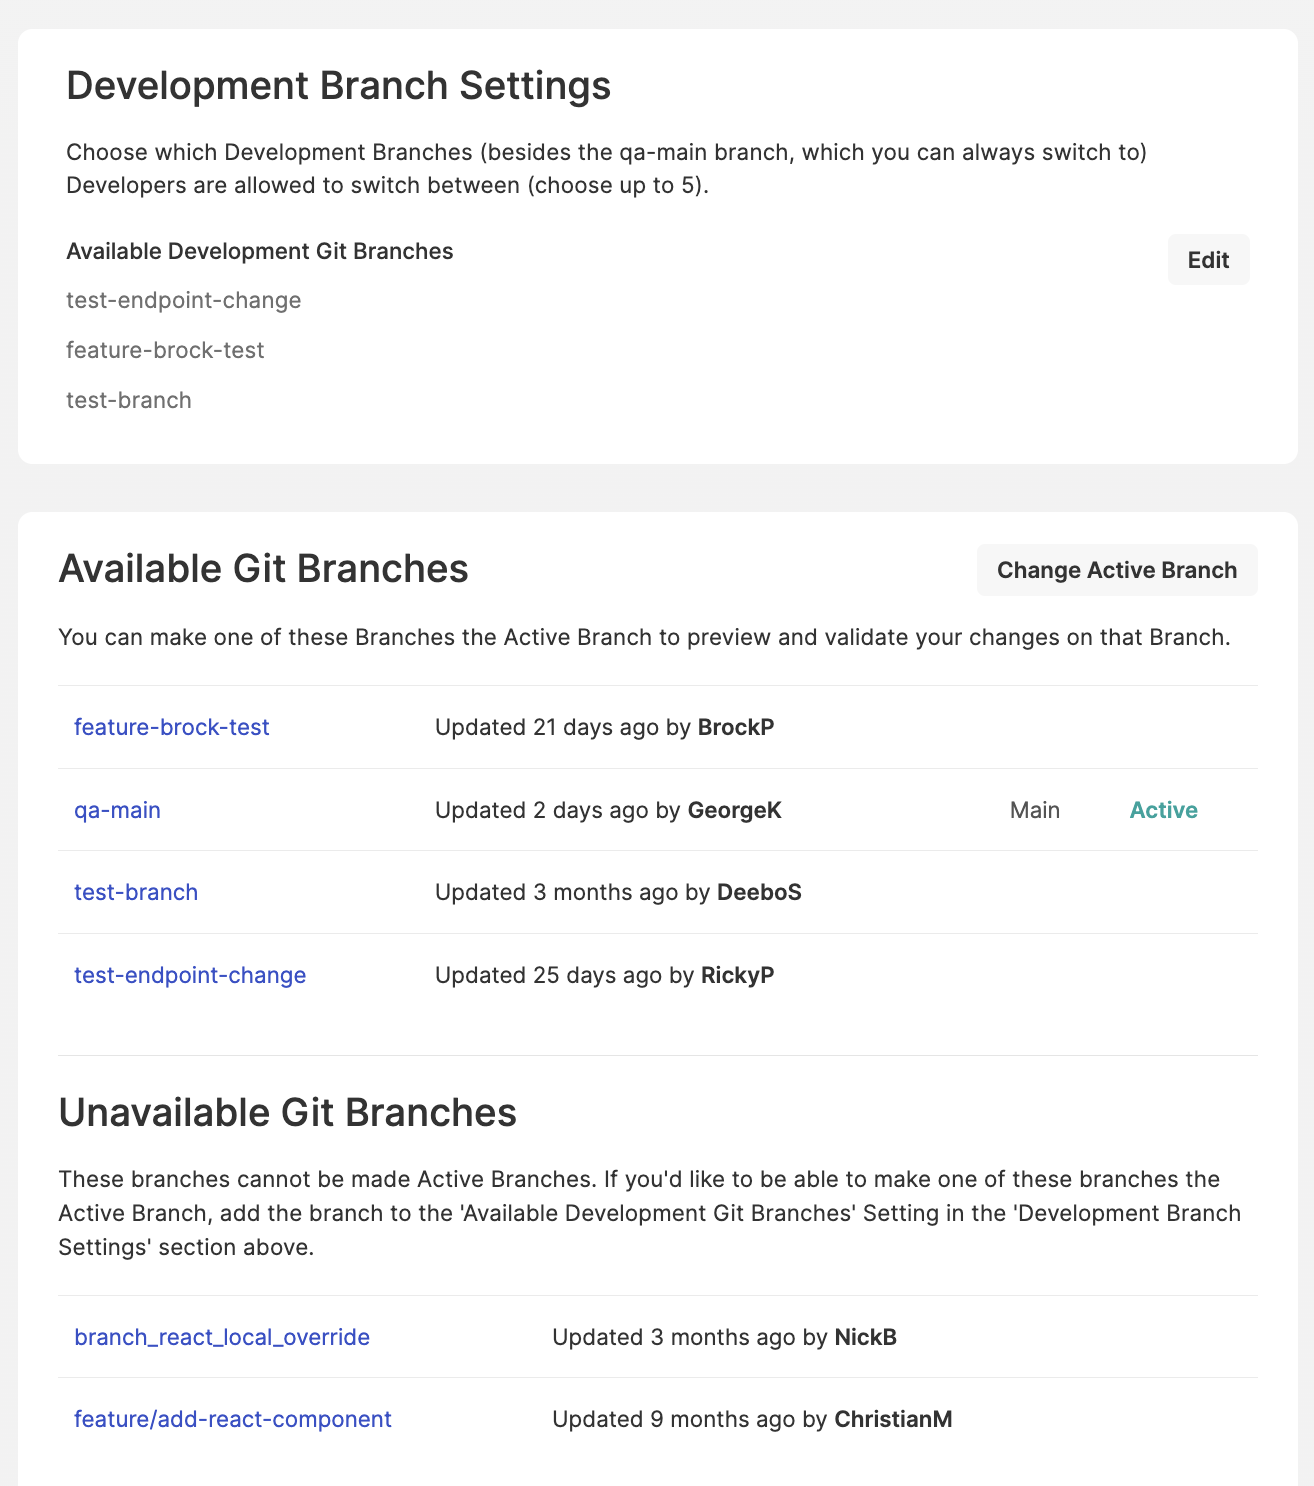
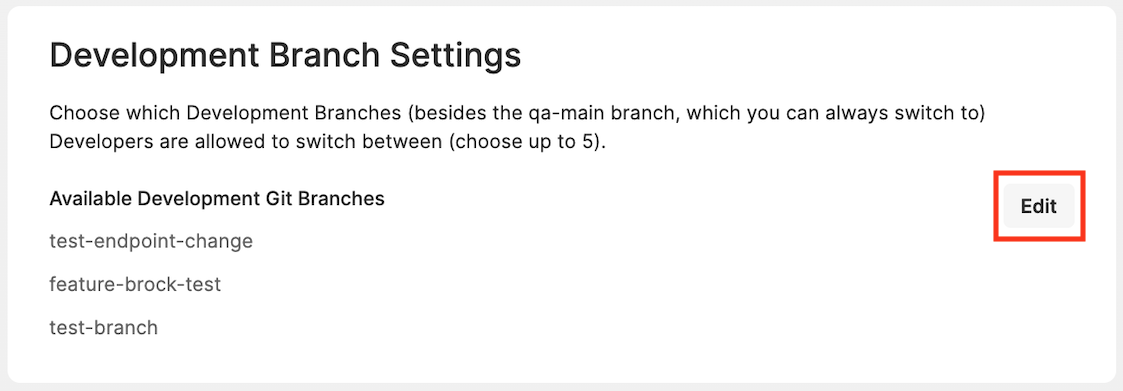
You can manage your Available Git Branches list using the Development Branch Settings section of Dev Tools. Only dev branches currently listed as Available are accessible in the branch switcher.
To manage your list of available branches:
- Select Edit.
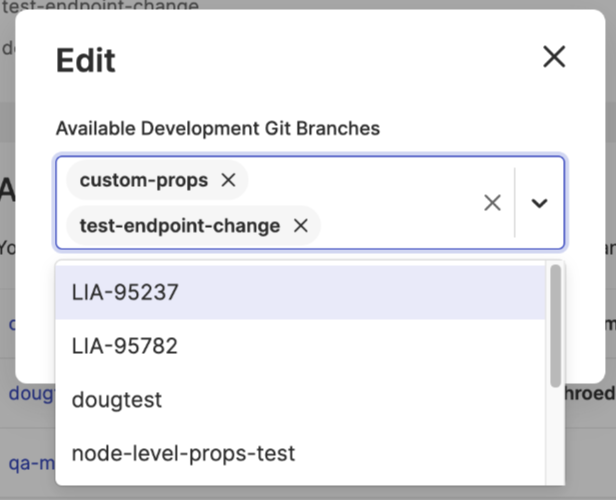
- Choose the branch(es) you want to make available using the drop-down menu.
- Remove any branches you want to make unavailable by selecting the X next to the branch's name.
- Select Save.
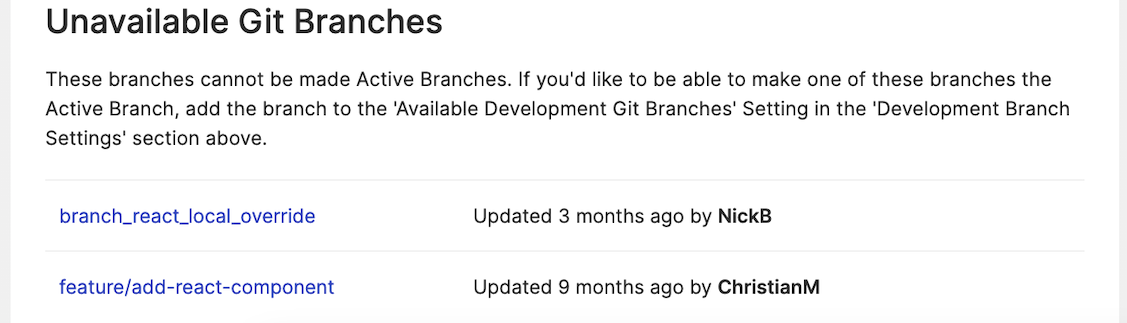
The Available Git Branches list now includes the updated list of branches. Any branches you've removed from the Available list appear in the Unavailable Git Branches section.

You may see the word Loading in red next to one of the recently-activated branches. This is because when a branch is activated, the plugin assets from the branch(es) are loaded and cached in the background. Depending on how many customizations are in the loading branch, this can take a few minutes or more.
Refreshing the page will update the branch loading status. A branch can't be switched to while it is still loading.
Branch switching
There are two methods to change the active branch for the current member—through the Dev Tools interface in the Admin or on the front end using the Git Branches display located in the lower-left corner of the page.
INFO
Only members with admin permission can use the branch-switching feature.
Dev Tools
The Active branch in the Git Branches section indicates which branch you are currently using to navigate through the community. This setting affects only the currently signed-in member and is primarily used for testing and validation.
INFO
The Git Branches section is displayed only on non-production sites.
To switch between branches:
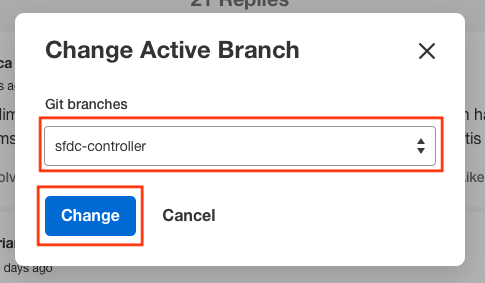
- Click Change Active Branch.
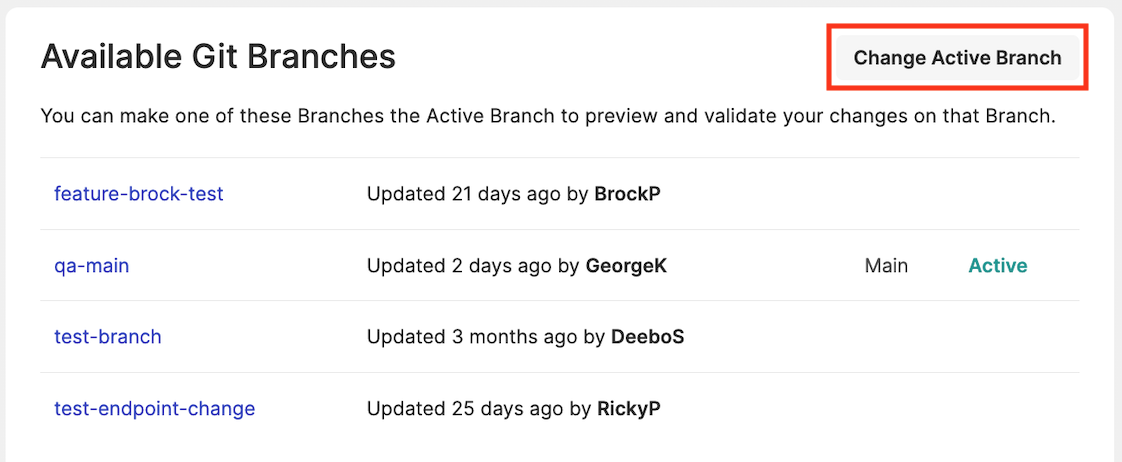
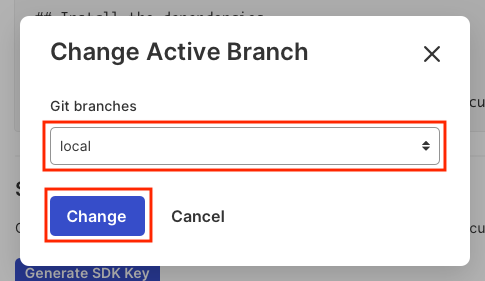
A window opens with a drop-down menu of available branches for you to choose from.
- In the Git branches drop-down menu, choose the branch you want to activate.
- Select Change to confirm your choice.
Your newly selected branch now has the Active indicator displayed next to it in the Git Branches section.
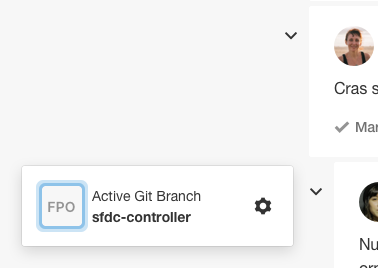
Front End Active Git Branch Tool
Members with the appropriate permissions see an Active Git Branch tool on the lower-left corner of the community's front end that displays the currently active branch for the member. You can use this tool to switch between branches or return to the default branch.
INFO
The Git Branches display on the front end is available only when the main branch is not selected.
To change the current branch:
- Select the Settings (gear) icon.
- Choose Change Active Branch from the list.
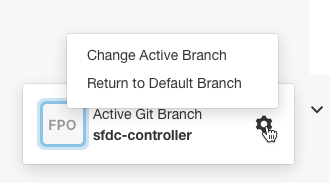
- Choose your desired branch from the drop-down menu.
- Select Change to confirm your selection.
Your selected branch is now listed in the window.
ATLAS
Comments